2. Installation Procedures
There are multiple ways to install T4SU. Choose the procedure depending on your OS. You can also directly upload it from inside SketchUp.
2.1. Under Windows
The following installation procedure assumes that you already have installed a recent release of the SketchUp software (Make or Pro). You simply have to:
- Download the latest Ruby script file (a file with the .rbs extension) available on sourcesup.renater.fr.
- Install the plugin by placing this Ruby script file into the appropriate folder (the Windows default location is: C:\Users\YOUR USERNAME\AppData\Roaming\SketchUp\SketchUp 2016\Tools),
- Restart SketchUp.
Once you have restarted SketchUp, you should see that various new commands have been added to the menus bar.
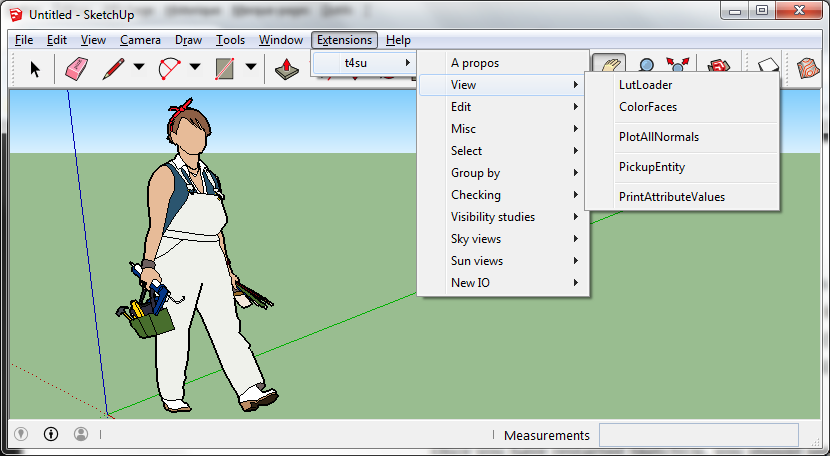
Various new commands have been added to the menus bar
2.2. Under Linux
Sketchup doesn’t propose a native Linux distribution. Nonetheless, many people use wine. There are many tutorials already online explaining how to install sketchup in an Ubuntu-based environment, so we’re not going to go through that again. Nonetheless, if you are having problems installing, here is a nifty little github project called SkipI that can make your life a little easier. Many Sketchup installation configurations under Linux require disabling the Ruby API, which we need. This method will ensure you can keep the API enabled by automatically installing a stable version of Sketchup8. SkipI will also configure a desktop shortcut for you.
First remove any earlier attempts at installing Sketchup. Then open a new terminal and hit :
wget https://raw.githubusercontent.com/wilfm/SkipI/master/skipi.sh
chmod +x skipi.sh
./skipi.sh
This will install Sketchup8, which isn’t the newest version, but it is at least stable on Linux. Once in Sketchup, you may realize that .rbs folders don’t work in older Sketchup versions : you’ll need a .rbz file. Making a .rbz is fairly straightforward, as it is actually just a .zip file. So send your T4su extension to a compressed file, then simply change the end of it’s name from .zip to .rbz. You’re now ready to go to Window > Preferences > Install Extensions... and select your t4su_version.rbz file.
Next, downoad the plugin from renater. Once in Sketchup, you may realize that .rbs folders, which work on Windows, don’t work in older Sketchup versions : you’ll need a .rbz file.
Making a .rbz is fairly straightforward, as it is actually just a .zip file. So send your T4su extension to a compressed file, then simply change the end of it’s name from .zip to .rbz.
You’re now ready to go to Window > Preferences > Install Extensions… and select your t4su_version.rbz file.
2.3. Installing T4SU through the Ruby console
The following installation procedure assumes that you already have installed a recent release of the SketchUp software (Make or Pro). You simply have to:
- Download the Ruby script file (a file with the .rbs extension) available on sourcesup.renater.fr;
- Copy it in the folder you want (let’s assume we choose: D:myScripts);
- Open ruby’s Console via the Window > Ruby Console menu entry;
- Install this new script file copying-pasting the following Ruby instruction into the command line interface (the console):
Sketchup::require('D:/myScripts/t4su-20161017.rbs')
You should not have to restart SketchUp to see that various new commands have been added to the menus bar.